
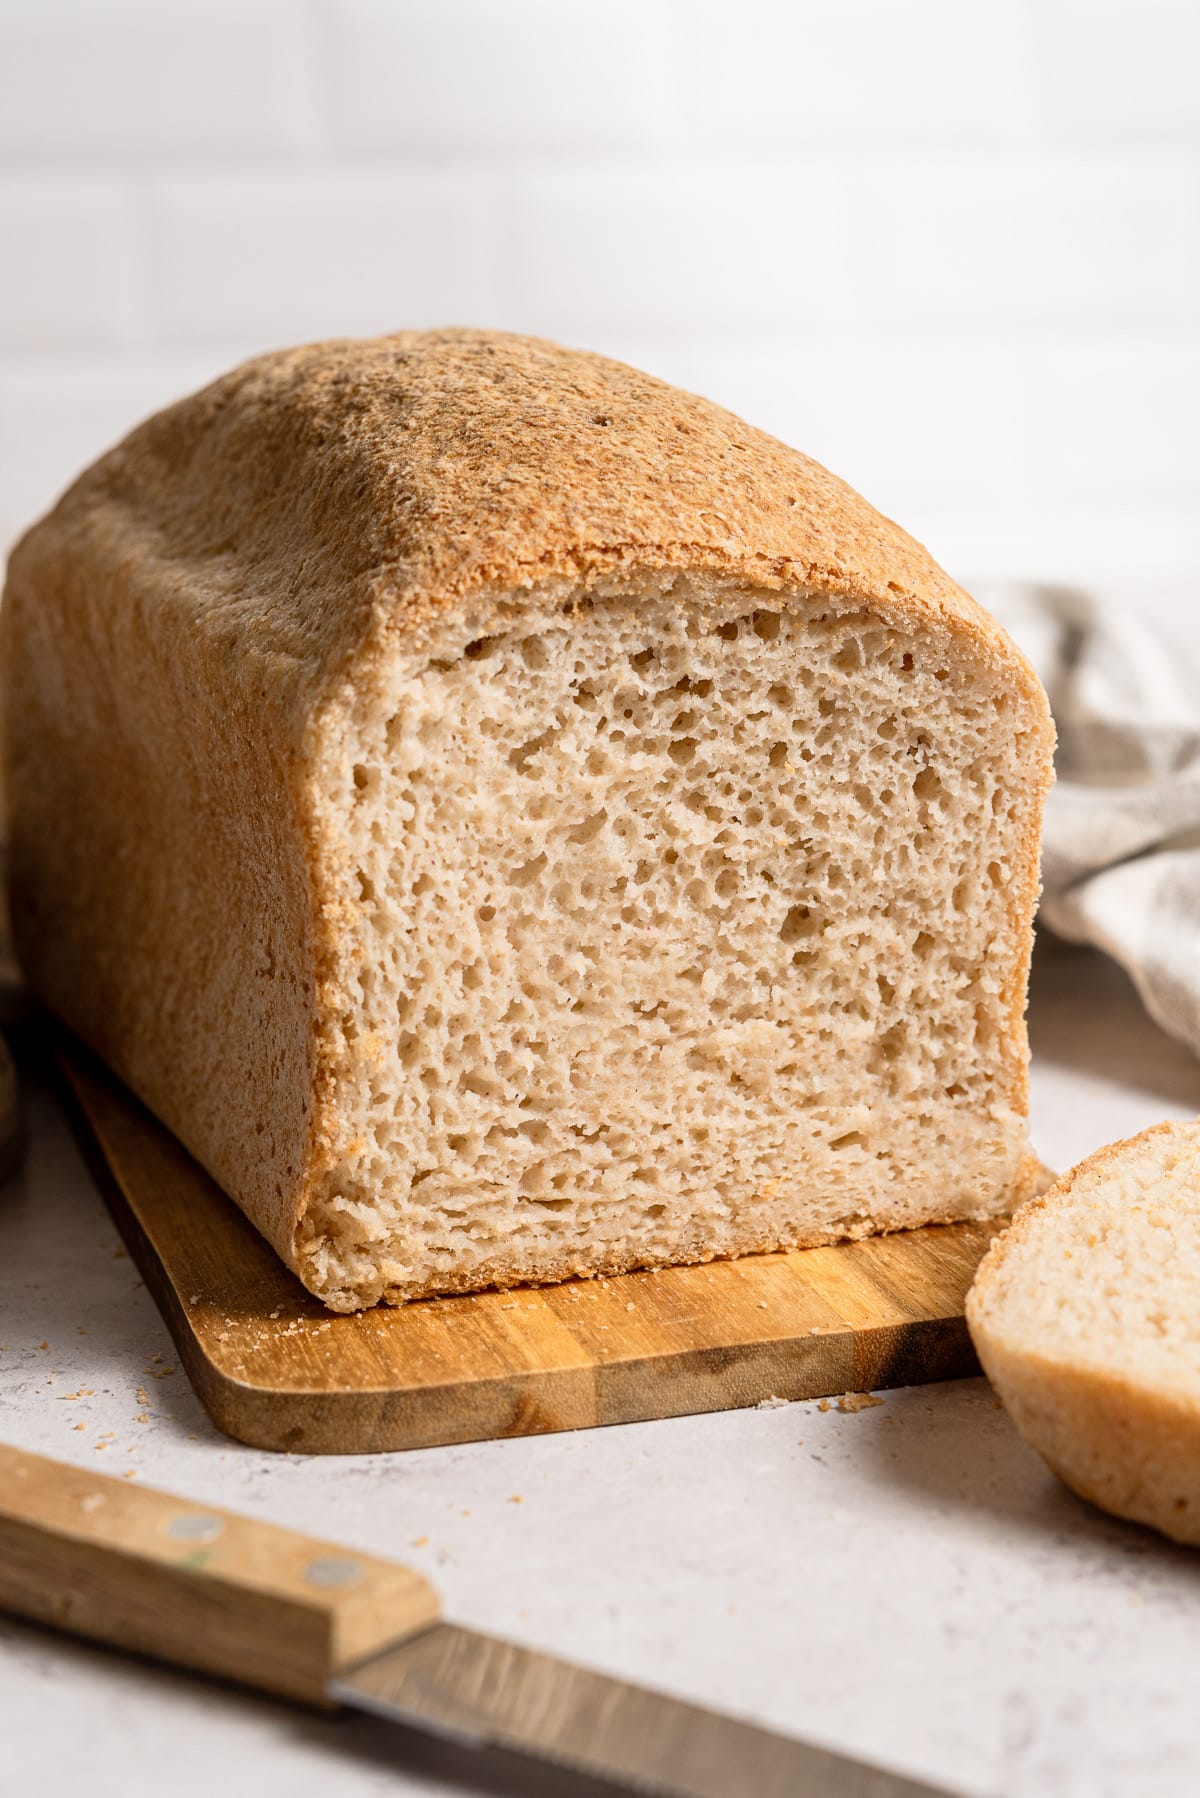
Finding a good gluten-free and vegan sandwich bread can be a challenge, especially when you want to avoid store-bought flour blends and additives like xanthan gum. This homemade gluten free sandwich bread is made with a custom flour mix for the perfect balance of texture and taste, soft, slightly chewy, and sturdy enough for your favorite sandwich fillings.
Jump to:
I've tested many gluten free bread recipes throughout the years, the good ones made it to the blog, but more than one did not.
This classic bread loaf has definitely been the one I've tested THE most, all the while it tested my patience too.
And I have been finally able to reach a very satisfying result for a gluten free bread for panini 😉
Why you will love this gluten free sandwich bread
Here's what you will love about this recipe inspired by classic white bread:
- it's made with an easily homemade flour blend
- without store-bought gluten free flour mixes and xanthan gum
- it's completely vegan, so dairy free, without eggs, butter and milk
- easy to make, very little kneading involved!
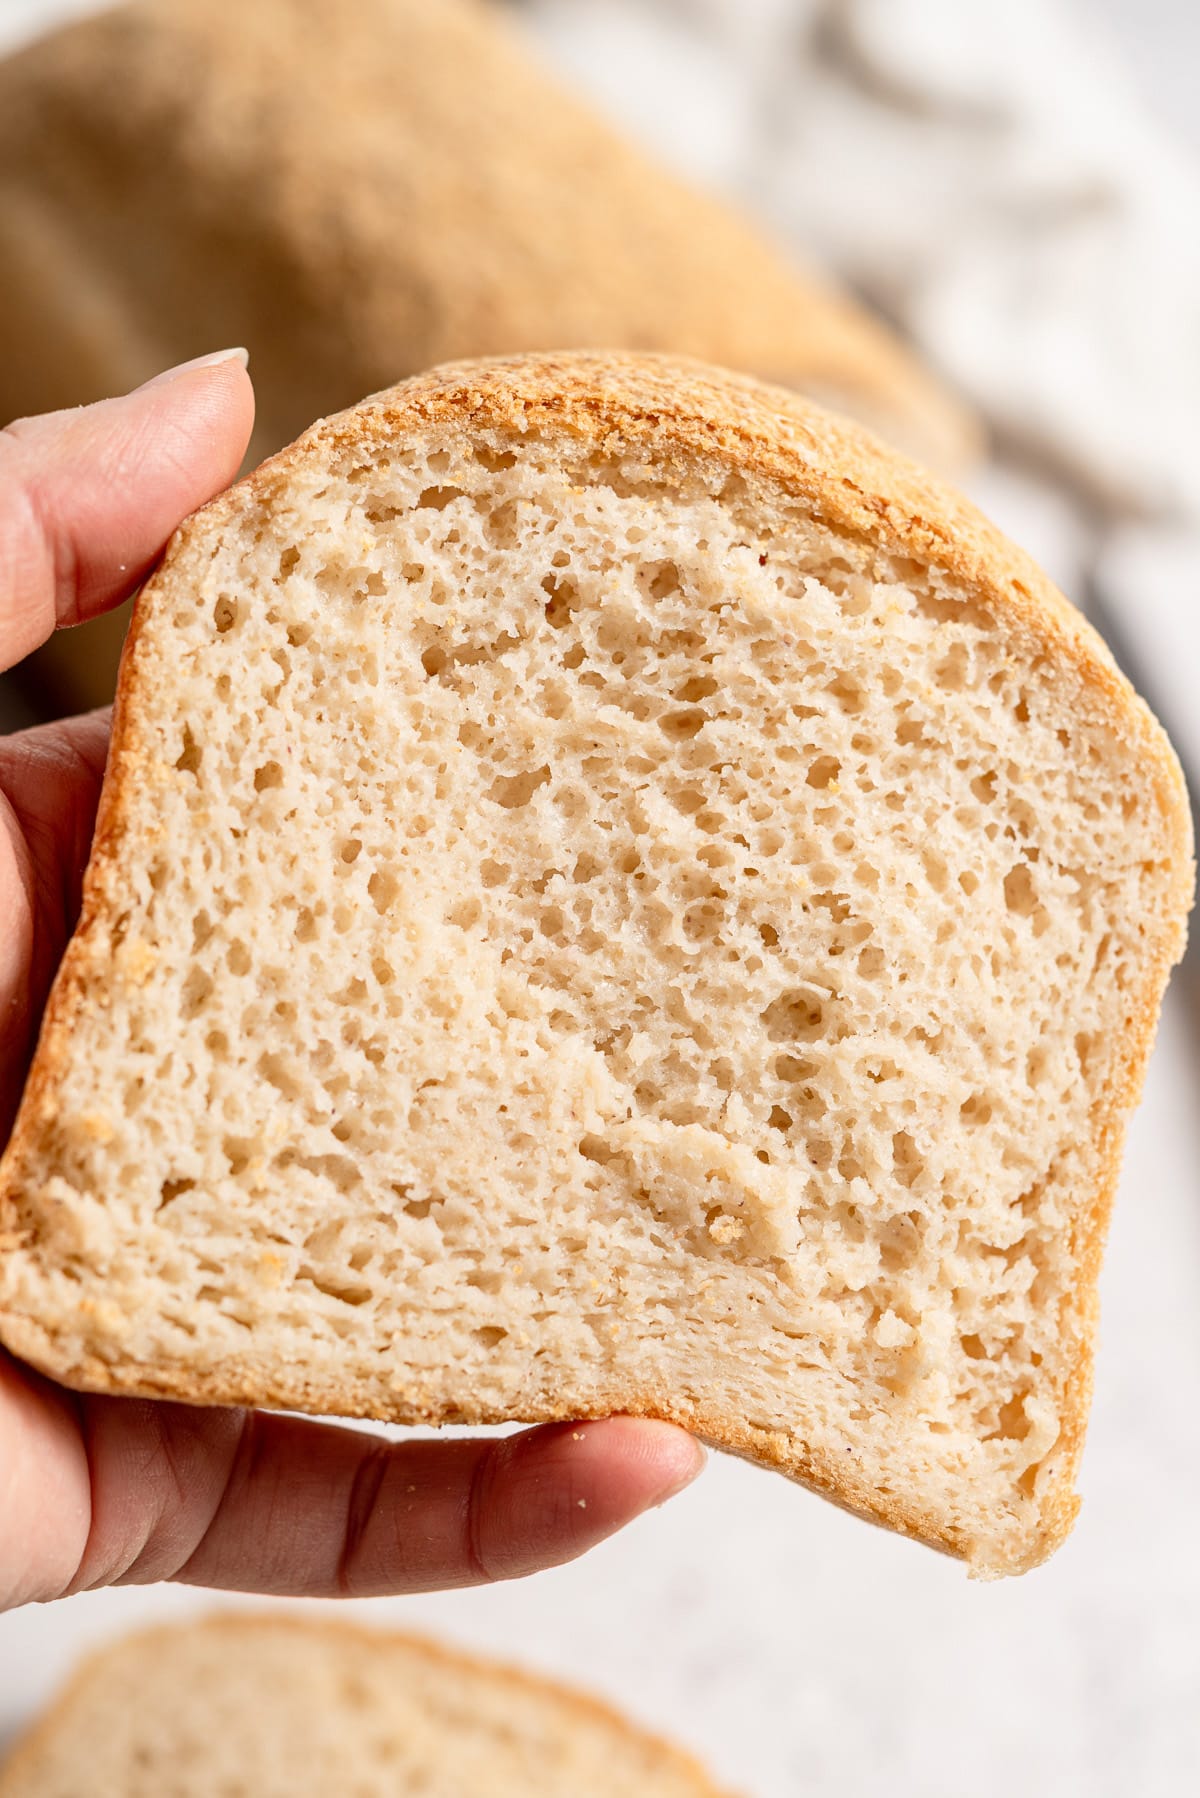
- it has a pretty neutral flavor, thanks to rice flours and potato starch
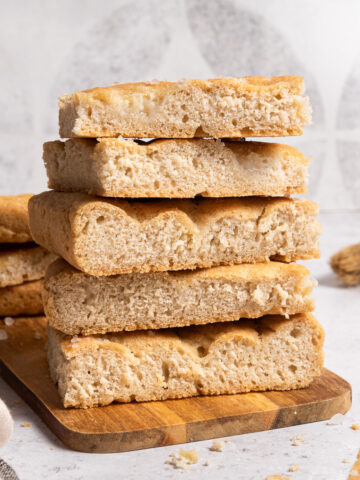
- soft and slightly chewy, it is great to make your favorite fresh sandwich, grilled cheese or toasted and spread with butter and jam!
Ingredients
To make this gluten free bread loaf from scratch you will need few simple ingredients:
Psyllium husk, it helps to bind the gluten free flours and keep the bread soft. I have used both whole and powder psyllium (I ground it myself) and they both work well.
Active dry yeast, make sure it is gluten free if needed
White rice flour, brown rice flours and potato starch for the flour blend
Water, at room temperature: this bread is highly hydrated which makes it nice and soft
Olive oil, extra virgin would be best, I just love the flavor it adds to this bread
Maple or agave syrup, this will help activating the yeast (you can use sugar too)
Vinegar, I like to use apple cider vinegar, white one will work too with helping the leavening process
Fine salt, last (literally) but not least. It is important to add it as the last ingredient so that it won't "kill the yeast" (while sugar/sweeteners activate it).
Instructions
Making your own homemade gluten free sandwich bread using rice flour is a lot easier than you might expect:
- in a large bowl add psyllium husk, yeast, white rice flour, brown rice flour, potato starch and mix well
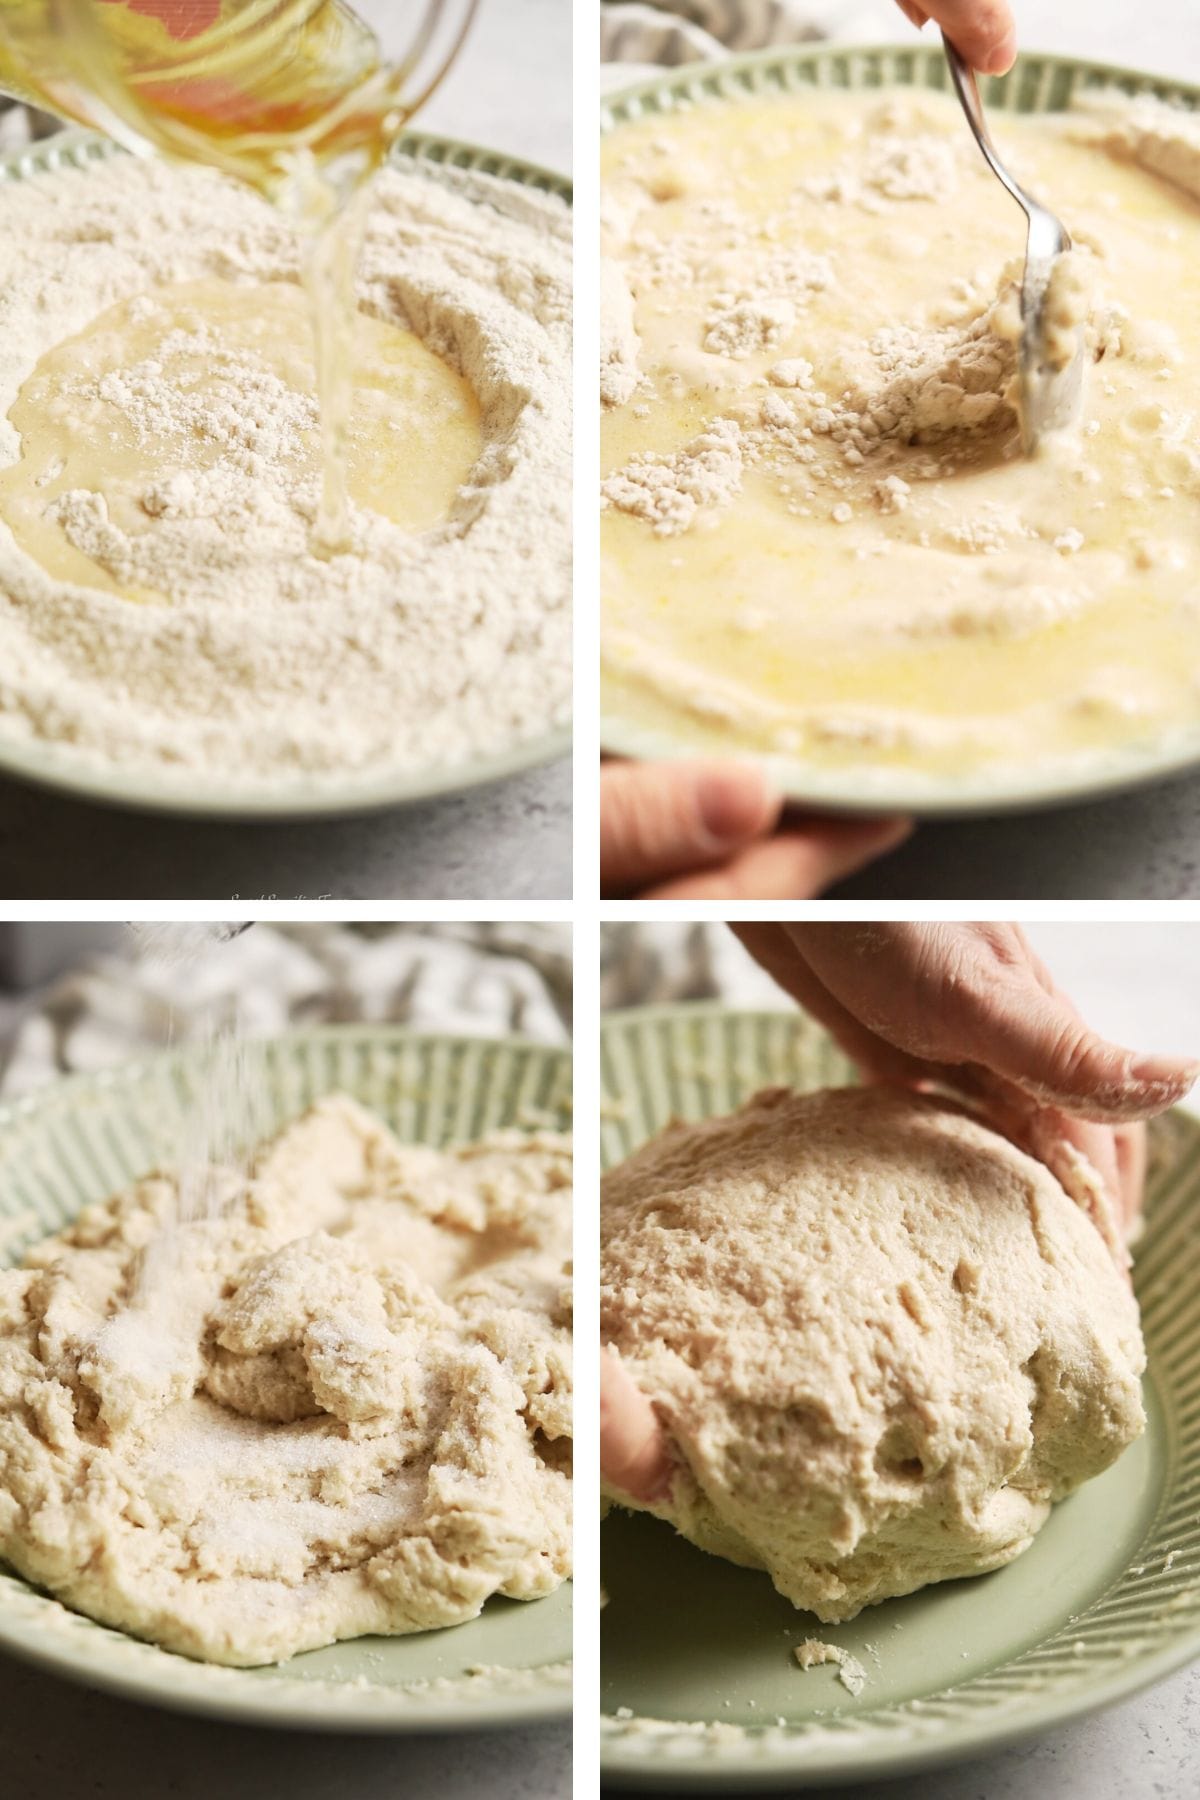
- in a pitcher or other bowl mix water, maple syrup, olive oil and vinegar
- pour the liquid mixture over the dry ingredients and mix with a spoon, making sure to incorporate everything and scraping remaining flours from the bottom
- add salt and keep mixing with the spoon and then with your hands, lightly mixing and kneading until you obtain a uniform ball of dough, a bit sticky
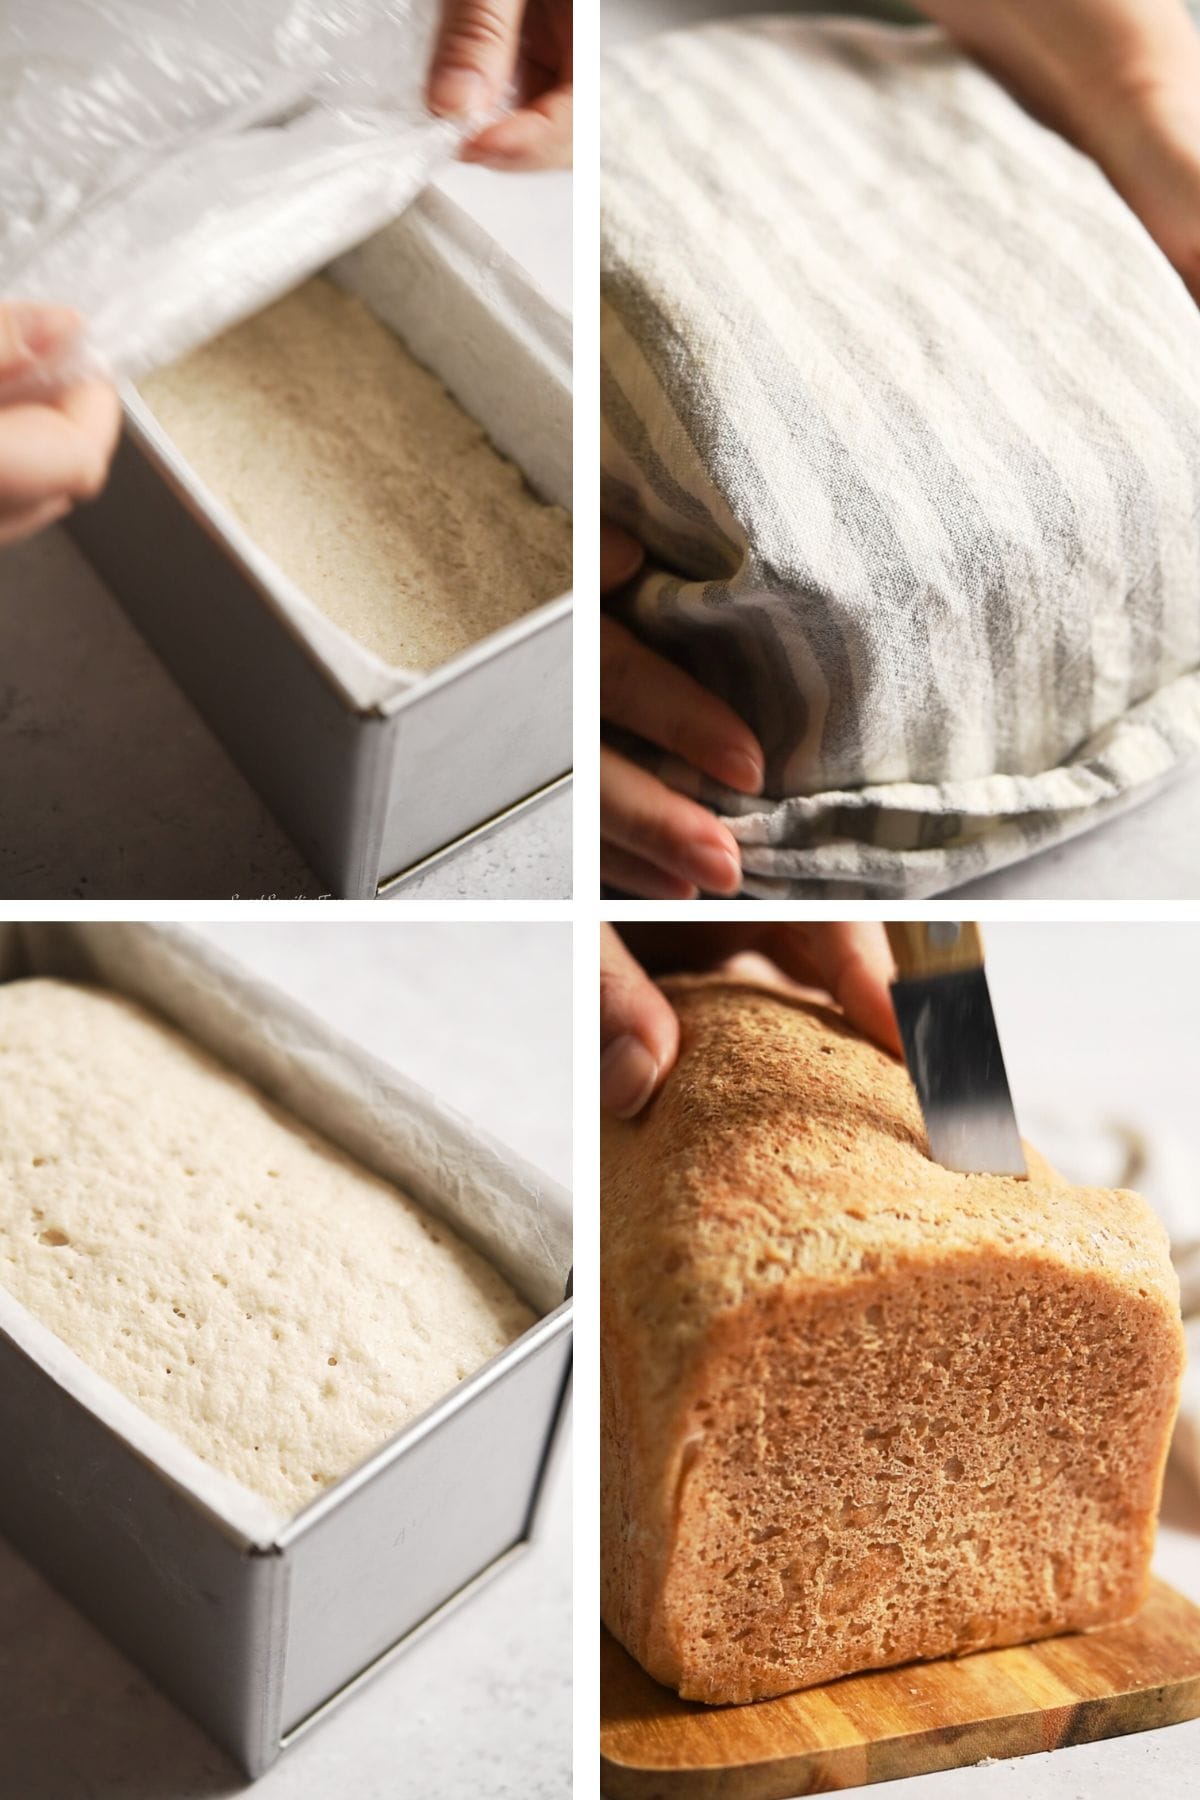
- place the dough inside the prepared pullman loaf pan, cover with cling film (or a thin plastic bag) and a napkin and let proof for 1.5 hours or until the dough doubles
- pre-heat oven at 220°C/430°F for 20-30 minutes
- remove cling film and napkin and place the pan on the lowest rack of the oven
- bake at 220°C/430°F for 20 minutes, then lower the temperature at 180°C/360°F and bake for 40-45 minutes
- let the bread cool for 15 minutes before removing it from the pan, place the bread on a cooling rack and let it cool for at least 4 hours, before slicing it.
Stored in an airtight container, this bread keeps soft for 2-3 days. You can also slice it, freeze it and re-heat or toast the slices whenever you need.
We love this bread, it's now become a staple in our household! We love to toast it, and when it's nice and crispy we spread it with butter or ghee, jams, or nut butters too. Delicious!
And if there is some leftover that dries up after a few days, I love to use it to make homemade breadcrumbs and croutons and freeze them for future use!
More gluten free bread recipes
This rice flour bread is great because of its neutral flavor, very close to traditional wheat bread. Which is why it also makes the perfect breadcrumb to add to other gluten free preparations, like meatballs and patties.
Should you want to try more breads that are gluten free, here are a few ideas:
artisan gluten free bread, with just the right touch of buckwheat for a flavorful bread
olive millet loaf, soft, with a rustic flavor and juicy olives
no yeast buns, quick and easy to make, perfect for your favorite burgers!
soft sage focaccia, inspired by a traditional Italian recipe, you will love this!
dairy free soda bread, soft and quick to make!
Baking in grams
I cook and bake in grams as they are more accurate (than cups) when measuring ingredients. This is especially important when it comes to gluten free and vegan recipes.
Also, I weigh both dry and wet ingredients in grams and most of the time I share one- or two-bowl recipes, to make everything easier for you.
A simple affordable kitchen scale is definitely a useful and worthy investment for your gluten free cooking.
So you will simply need to place the bowl on the scale and weigh ingredients as you go!
If you make this recipe or have questions, leave me a comment down here! And a 5 star rating if you have loved it would help me grow the blog 😉
For all the updates, follow me on Pinterest and Instagram and tag me if you make this or any of my recipes! I absolutely LOVE to see what you make and share it in my stories!
Ciao!
Sonia
📖 Full Recipe

Gluten free Sandwich Bread (Homemade Flour Blend, No Xanthan Gum)
Equipment
- kitchen scale
- large bowl
- Pitcher or bowl
- spoon
- parchment paper
- 9x5 pullman loaf pan
Ingredients
- 25 grams psyllium husk (whole or powder) I prefer to grind whole psyllium at home using a coffee grinder)
- 7 grams active dry yeast, gluten free (usually one small sachet, dose for 500 grams flours)
- 300 grams brown rice flour (gluten free)
- 100 grams white rice flour (gluten free)
- 100 grams potato starch, gluten free
- 625 grams water, room temperature
- 1 tablespoon maple or agave syrup (alternatively, sugar)
- 1 teaspoon vinegar (white or apple cider)
- 1 tablespoon extra virgin olive oil + extra for greasing the pan
- 2 teaspoon fine salt
Instructions
- Lightly grease the pullman loaf pan with olive oil and line it with parchment paper
- In a large bowl add psyllium husk, yeast, white rice flour, brown rice flour, potato starch and mix well
- In a pitcher or other bowl mix water, maple syrup, olive oil and vinegar
- Pour the liquid mixture over the dry ingredients and mix with a spoon, making sure to incorporate everything and scraping remaining flours from the bottom
- Add salt and keep mixing with the spoon and then with your hand, lightly mixing and kneading until you obtain a uniform ball of dough, slightly sticky
- Place the dough inside the prepared loaf pan, cover with cling film (or a thin plastic bag) and a napkin and let proof for 1.5 hours or until the dough doubles in size
- Pre-heat oven at 430°F / 220°C for 20-30 minutes
- Remove cling film and napkin and place the pan on the lowest rack of the oven (not directly on the oven surface)
- Bake at for 20 minutes at 430°F / 220°C, then lower the temperature at 360°F / 180°C and bake for 40-45 minutes (the top should be puffed-up and golden-brown)
- Let the bread cool for 15 minutes before removing it from the pan
- Place the bread on a cooling rack and let it cool for at least 4 hours, before slicing it (this bread is pretty humid, so the inside needs time to dry and settle)
- Stored in an airtight container it keeps soft for 2-3 days
- Alternatively, slice it and freeze it so you have it ready to be toasted whenever you need!


Emilye says
Thanks so much for continuing to share with us your wonderful recipes! I love that you don’t use commercial gf mixes or xanthan gum.
I usually only stock brown rice flour; any suggestions for substituting the white rice flour?
I have millet, oat, buckwheat, teff, sorghum..
Sweet Sensitive Free says
Hi Emilye, thank you for your comment! In this recipe replacing white rice flour with brown one should work fine (or 50 gr brown rice flour + 50 gr potato starch). It is starchy enough. I am not sure about the result you would get with millet, oat, buckwheat, teff, sorghum, as they have very different ways of absorbing liquids.
Ann Hurley says
I am a very experienced bread maker. However, my dough for your recipe is quite liquidy. Did you mean 625 ml not 625 g for the water? Please help.
Thanks Ann
Ann Hurley says
Hi. My email from yesterday may not have been sent.
I am an experienced bread maker. To make your bread I bought the ingredients and weighed them all according to the recipe. My batter was liquidy so I couldn’t even need it. My yeast worked though as the runny batter rose.
Could the water be the problem. Should it have been measured in ml instead of grams?
Please help. I want to try it again.
Thanks Ann
Sweet Sensitive Free says
Hi Ann, thank you for your comment. I'm really puzzled about what might have gone wrong. I weigh everything in grams, liquids too (for practicality). Did you add the psyllium too? I know it's 625 grams water for 500 gr flours, but the psyllium absorbs a lot of liquids and makes the dough dense.
Ann says
Thanks for getting back to me Sonia. I couldn’t get the psyllium so, after googling a substitute for it, I used ground flax seeds instead, but in the same quantity. Would that have made such a huge difference?
Sweet Sensitive Free says
Yup, it does make a difference. Psyllium and flax seeds absorb water in different ways. They both form a "gel", but flaxseeds one is more liquid and does make the batter/dough more liquid too. Psyllium makes it denser.
Ann says
Thanks Sonia
Akirah says
Hi, I was wondering if you would be able to make this in a bread maker and if there is a certain brand that you would recommend to get for the flour and starches?
Sweet Sensitive Free says
Hi, unofortunately I haven't made this bread in a bread machine so I can't say if the recipe would work or not. I live in Italy and brands I have access to here are probably different from the ones you have where you live, but this is also why I use a homemade mix of single gluten free flours rather than gf commercial mixes. Fine/brown rice flour and starches should be more or less similar everywhere (hopefully!)
Vicky Gagnon says
Bonjour, est-il possible de mettre juste de la farine de riz blanc sans gluten pour la recette de pain ? Merci d'avance pour votre réponse!
Sweet Sensitive Free says
Hi! I would advice against using fine white rice flour in place of brown one, it absorbs liquids in a different way, the dough would become too thick and the bread too dense.
Ann Hurley says
Hi again Sonia. I finally found some psyllium husk and my dough wasn’t runny, just wetter than I thought it should be. It rose but looked a little bit flat. But it didn’t rise in the oven and came out flat and not high at all. The bread tastes really good though.
I have very carefully measured all ingredients.
Any suggestions?
Thanks
Ann
Sweet Sensitive Free says
Hi Ann, thank you for your feedback. It's really hard for me to tell what might have stopped the bread from properly rising. Did you keep it covered during the proofing time? I should add to the post that the dough should be proofing in a not cold area, without air streams. Did you place the bread on the lowest rack in the oven? (this should help give a first "kick" to the rising in the oven).
Sometimes it might depend on the flours, the yeast, the oven itself. I hope that even if a bit flat, the texture and flavor were good. If you're note happy to use it for sandwiches, maybe consider making croutons and breadcrumbs to freeze for future use and no waste: https://sweetsensitivefree.com/homemade-croutons-breadcrumbs-glutenfree-dairyfree-cornfree/
Jane says
I've already made this bread multiple times and it's always a success. Finally a loaf that slices properly and I can make sandwiches with!
Linda says
Do you have a recipe for bread without yeast, gluten, soy, dairy, sorghum, eggs, and psyllium husk?
Sweet Sensitive Free says
Hi, this recipe should meet your dietary needs https://sweetsensitivefree.com/soft-gluten-yeast-free-bread/ Let me know!
Natalia says
could I substitute the brown rice flour with sorghum flour?
Sweet Sensitive Free says
Hi, I haven't tested the recipe with other flours than those listed. Sorghum flour is less "starchy" than brown rice flour, so I'm afraid the end result might differ quite a bit.
Mary says
I've already made this recipe a few times and it's always a win! Finally a soft bread without commercial mixes that I can use for my lunch box sandwiches!
Ann Hurley says
Hi Sonia. This bread has finally worked out beautifully for me. I bought flax seed and made sure to follow your recipe to a tee.
Thanks for this recipe and all the work you put into it.
Sincerely
Ann
Sweet Sensitive Free says
I'm so happy to read this!! Great!
Michelle says
Can you use this recipe to make hot dog buns? if so, will they freeze well or crumble when trying to eat?
Sweet Sensitive Free says
Hi! I haven't tried but I'm afraid this recipe wouldn't work for hot dog buns, the dough is pretty soft, which works in a loaf pan but not to be shaped into buns.