
Finally, after several tests and many requests on Instagram, I’m sharing here on the blog my recipe for the gluten free long-leavened pizza (24h).
It took me a while to share, but I wanted to make sure it came out good and when my food sensitive sweetheart approved my 5th test too, I finally decided to post the recipe.
This gluten free long-leavened pizza needs time and some attentions, but nothing complicated!
Also because, if you know me, I’m on the lazy side and don’t really like complicated stuff.
Ingredients
The ingredients for this gluten free pizza dough are few and easy to source, no need for a specific store-bought or commercial flour blend:
- dry active yeast
- brown rice flour
- sorghum flour
- gluten free starch
- white rice flour
- sugar
- water
- olive oil
... and all the toppings you want!
Find all the quantities and directions in the recipe card below.
Instructions
So, let’s start!
- I usually prepare the dough on Friday night, before dinner, to be ready for Saturday night (full Italian style)
- in a bowl mix yeast, rice flour, sorgum flour, potato starch, sugar and mix well
- add the water and carefully incorporate all the ingredients, making sure no flour is left at the bottom of the bowl
- add the salt and mix everything again
- grease another bowl or a food container with a teaspoon of olive oil, transfer the dough and close either with cling wrap or the container’s lid, so that it’s airtight.
- within the next hour, for at least 3 times every 10-15 minutes, stir the dough with a spatula/spoon, folding the outer sides towards the inside and close the container again (in “regular” doughs this process helps to develop the glutinic mesh, which obviously doesn’t happen here, but it helps to incorporate air and seal it for the leavening)
- after this step, let the dough proof in its airtight container in a warm, air-draught free area. I usually let it rest in the oven (turned off and closed), but a cupboard is fine too
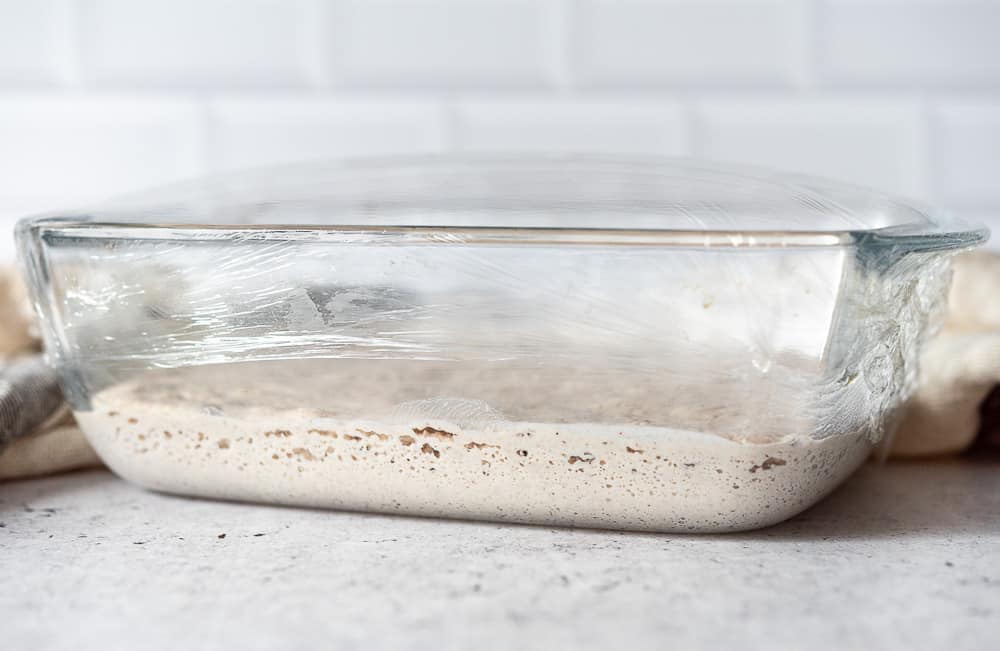
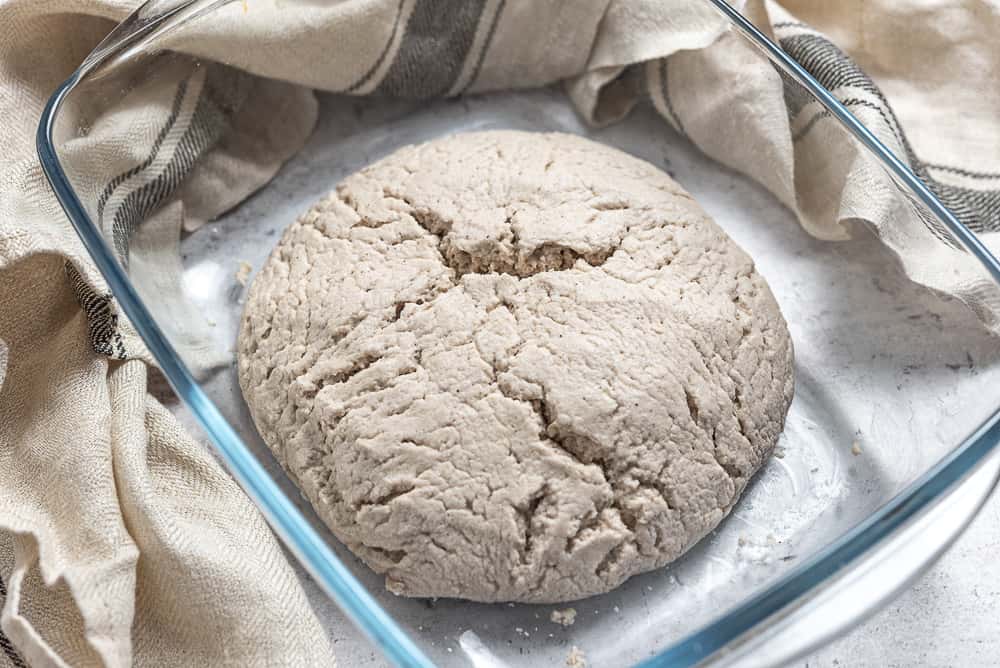
- around mid afternoon of the day after (= after 20 hours ca.) get the dough out - it should be triple in size and full of air bubbles - and add 40 gr. of white rice flour, carefully incorporating it to the dough
- you will be able to work the dough with your hands at this point and form a dough ball, which you will place back in the airtight container and let proof for another 3 hours
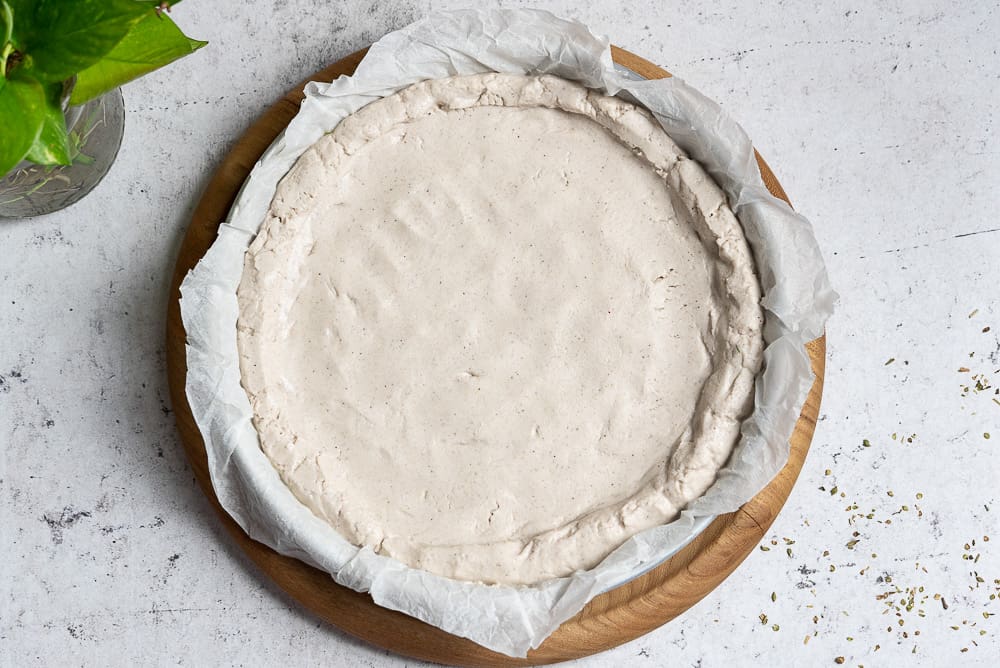
- after the 3 hours have passed, grease the baking pan with some olive oil (or cover it in parchment paper), put the dough on the pan and spread it by pushing it down with your hands, leaving the borders a bit higher and thicker (see photo)
- let the pizza base rest for another 30-40 minutes
- in the meantime pre-heat your oven at 190° C / 380 F and proceed with the seasoning of your choice only a few moments before putting the pizza into the oven, so that the dough won’t get too humid, not baking properly
- important step for a brown and crunchier crust: right before baking it, brush it with a little olive oil
- bake for 25 minutes, or until both the border and the base (under) are nice and brown.
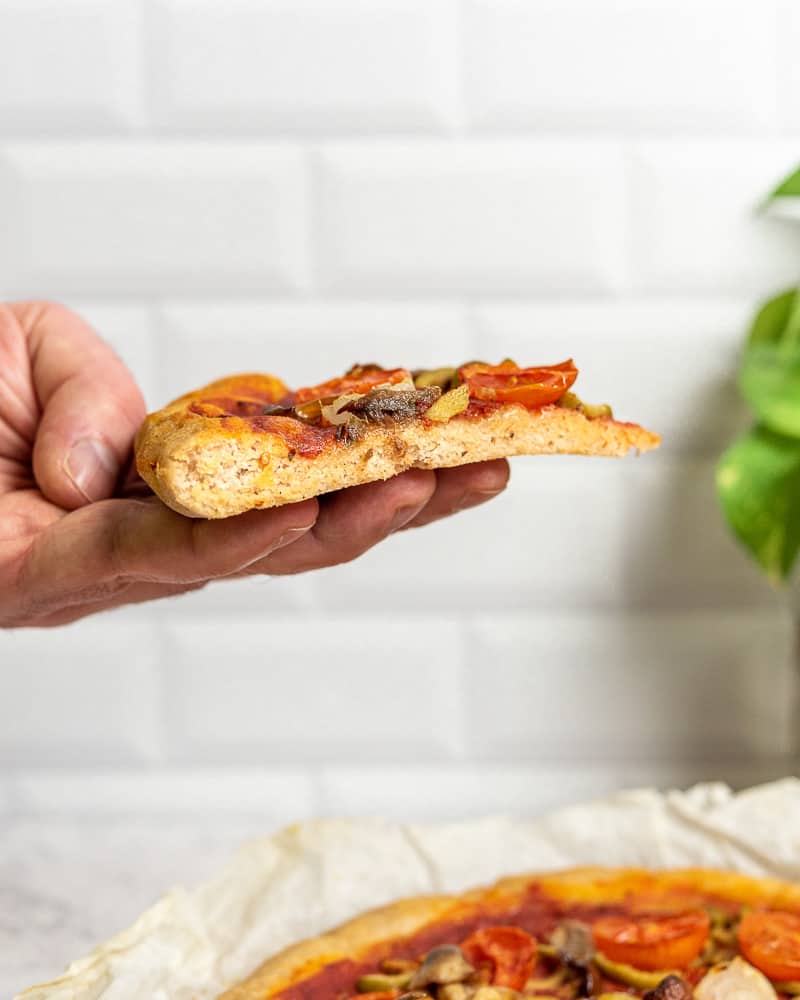
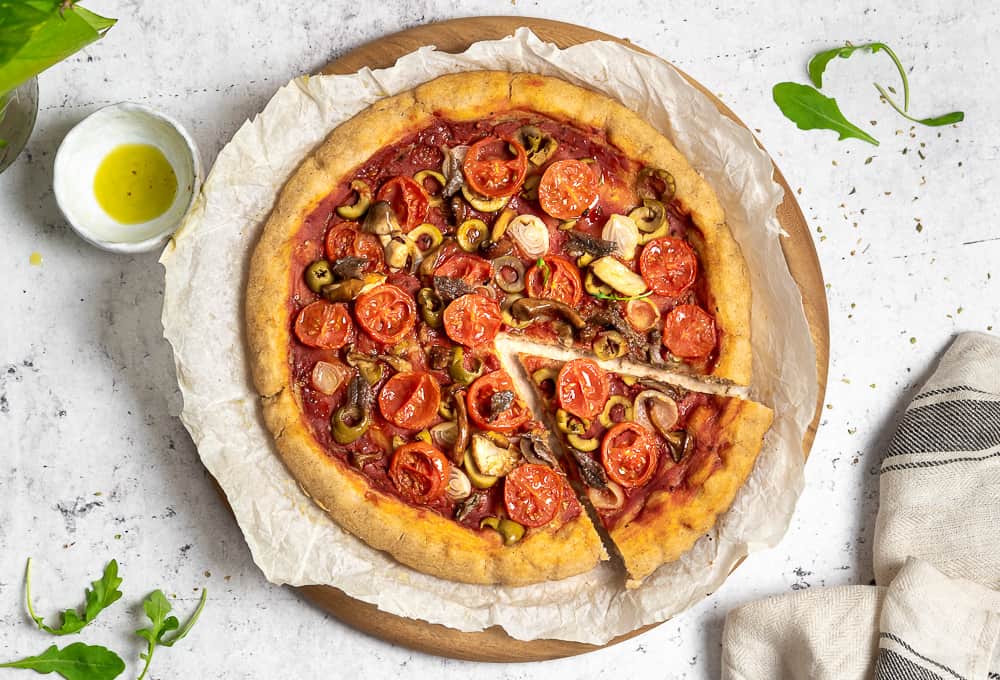
This long leavened gluten free pizza crust is soft inside and nice and crunchy outside and thanks to the little amount of dry yeast and the long proofing time, it’s also much easier to digest.
Please note that, as I’m not using thickeners or storebought-ready gluten free flour mixes, the dough can not be rolled out as regular pizzas and it won’t have the traditional “air bubbles” in the crust.
The result is awesome nontheless, the brown crust makes it crunchy and the long leavening adds that characteristic bread baking taste and scent.
Let me know in the comments what you think and if you have any question and don’t forget to tag me on Instagram if you make this or any of my recipes, I love seeing them!
Ciao!
Sonia
Something to snack on while the pizza is baking? Try this delicious savory herb fritters! The perfect gluten free appetizer!
📖 Full Recipe

Long-leavened Gluten free Pizza Dough (24h)
Equipment
- 1 kitchen scale
- 2 bowls
- 1 spoon
- 1 baking pan (parchment paper)
Ingredients
{I use grams because it allows me to be more precise with measurements}
- 1 grams (¼ tsp) gluten free active dry yeast
- 120 grams (1 CUP) gluten free brown rice flour
- 70 grams (½ CUP + 1 tbsp) gluten free sorghum flour (can be substituted with brown rice flour)
- 80 grams (½ CUP) gluten free (potato) starch
- ½ teaspoon brown sugar
- 180 grams (1 CUP) room temperature water
- 40 grams (¼ CUP) gluten free white rice flour
- olive oil
Instructions
- This dough needs 24 hours to proof (I usually prepare the dough on Friday night, before dinner, to be ready for Saturday night)
- in a bowl mix yeast, rice flour, sorgum flour, potato starch, sugar and mix well
- add the water and carefully incorporate all the ingredients, making sure no flour is left at the bottom of the bowl
- add the salt and mix everything again
- grease another bowl or a food container with a teaspoon of olive oil, transfer the dough and close either with cling wrap or the container’s lid, so that it’s airtight
- within the next hour, for at least 3 times every 10-15 minutes, stir the dough with a spatula/spoon, folding the outer sides towards the inside and close the container again (in “regular” doughs this process helps to develop the glutinic mesh, which obviously doesn’t happen here, but it helps to incorporate air and seal it for the leavening)
- after this step, let the dough proof in its airtight container in a warm, air-draught free area. I usually let it rest in the oven (turned off and closed), but a cupboard is fine too
- around mid afternoon of the day after (= after 20 hours ca.) get the dough out - it should be triple in size and full of air bubbles - and add 40 gr. of white rice flour, carefully incorporating it to the dough
- you will be able to work the dough with your hands at this point and form a dough ball, which you will place back in the airtight container and let proof for another 3 hours
- after the 3 hours have passed, grease the baking pan with some olive oil (or cover it in parchment paper), put the dough on the pan and spread it by pushing it down with your hands, leaving the borders a bit higher and thicker (see photo)
- let the pizza base rest for another 30-40 minutes
- in the meantime pre-heat your oven at 190° C / 380 F and proceed with the seasoning of your choice only a few moments before putting the pizza into the oven, so that the dough won’t get too humid, not baking properly
- important step for a brown and crunchier crust: right before baking it, brush it with a little olive oil
- bake for 25 minutes, or until both the border and the base (under) are nice and brown.


Leave a Reply